If Microsoft’s PC Health Check app told you your PC fails on TPM 2.0 or Secure Boot, there’s genuinely good news: on most PCs built in the last several years, this isn’t a hardware problem at all. It’s a setting sitting switched off in your BIOS/UEFI firmware, and turning it on usually takes less than five minutes. Here’s exactly how to do it, along with the manufacturer-specific quirks that trip people up.
First, understand what you’re actually enabling
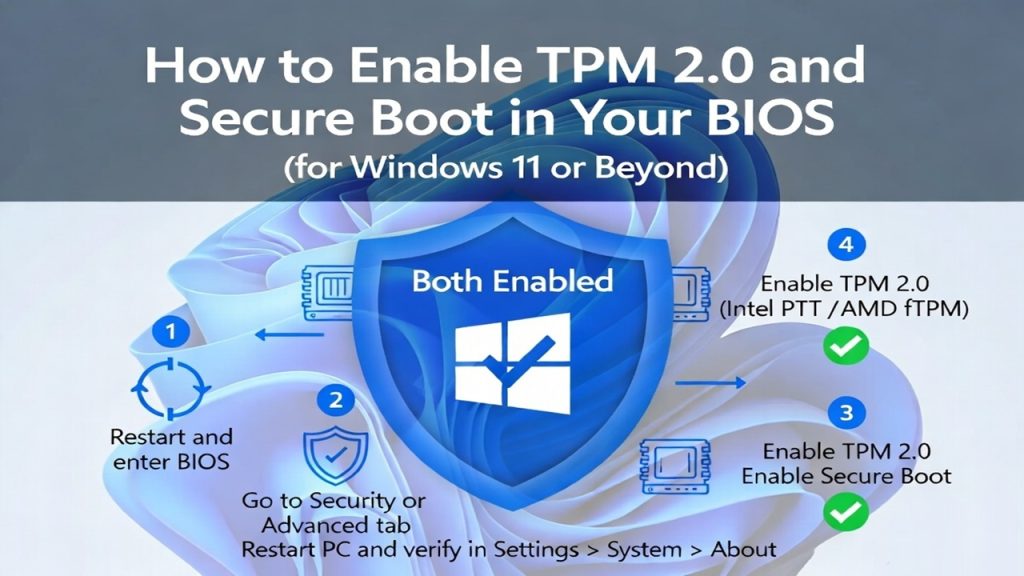
TPM (Trusted Platform Module) 2.0 is either a dedicated security chip or a firmware-based equivalent built into your processor, and it handles encryption keys and hardware-level security functions, including BitLocker drive encryption and Windows Hello. On Intel systems, the firmware-based version is called PTT (Platform Trust Technology). On AMD systems, it’s called fTPM (firmware TPM). Both do the same job as a dedicated physical chip, and both satisfy Windows 11’s requirement equally.
Secure Boot is a UEFI firmware feature that checks the digital signature of software loading during startup, before your operating system even boots, blocking anything unauthorized or tampered with. It requires your PC to be running in UEFI mode rather than older Legacy BIOS mode, which is worth checking first if Secure Boot’s option is grayed out or missing entirely.
Step 1: Restart your PC and enter BIOS/UEFI settings
This is where the process varies most by manufacturer, since there’s no single universal key. Restart your PC and repeatedly press the relevant key as it boots, before Windows starts loading:
Dell PCs typically use F2. HP PCs typically use F10 or Esc. Lenovo PCs typically use F1, F2, or Enter followed by F1. ASUS PCs typically use F2 or Del. Acer PCs typically use F2 or Del. Custom-built PCs with a standalone motherboard usually use Del or F2, though this depends entirely on the motherboard manufacturer (ASUS, MSI, Gigabyte, ASRock all vary slightly).
If you’re not sure which key applies, restart your PC and watch the very first screen closely, many manufacturers briefly display something like “Press F2 to enter setup” during the initial boot logo. Alternatively, in Windows itself, go to Settings, System, Recovery, and use “Restart now” under Advanced startup, then navigate to Troubleshoot, Advanced options, UEFI Firmware Settings, and Restart. This method works regardless of which key your specific manufacturer uses.
Step 2: Find and enable TPM (or PTT/fTPM)
Once inside your BIOS/UEFI settings, the exact location varies by manufacturer, but it’s almost always under a tab labeled Security, Advanced, or sometimes Trusted Computing.
On Intel-based systems, look for “Intel Platform Trust Technology” or simply “PTT,” and set it to Enabled.
On AMD-based systems, look for “AMD fTPM switch” or “Firmware TPM,” and set it to Enabled.
On systems with a dedicated physical TPM chip (less common on modern consumer PCs, more common on some business laptops and desktops), you may see a straightforward “TPM Device” or “Security Chip” option to enable directly.
If you genuinely can’t find any TPM, PTT, or fTPM option anywhere in your BIOS after checking each of these tabs, that’s a stronger signal your specific motherboard doesn’t support it at all, meaning this is a hardware limitation rather than a setting to toggle.
Step 3: Find and enable Secure Boot
Look for a tab labeled Boot or Security, and find “Secure Boot,” setting it to Enabled.
Two things commonly block this step specifically. First, some systems require you to set your boot mode to UEFI (rather than Legacy or CSM, Compatibility Support Module) before Secure Boot becomes available as an option at all, so check for a “Boot Mode” setting nearby and switch it if needed. Second, some systems require you to clear existing Secure Boot keys and reload default factory keys if you’ve previously disabled it and made other changes, usually through an option like “Restore Factory Keys” in the same menu.
If switching your boot mode from Legacy to UEFI, be aware this can occasionally affect whether your existing Windows installation boots correctly afterward, particularly on older installations. If you’re not confident about this specific step, it’s worth backing up your system first. We cover exactly how in How to Back Up Your PC Before a Major Windows Update.
Step 4: Save changes and exit
Look for a “Save & Exit” option, usually accessible by pressing F10 on most systems, or navigating to an explicitly labeled tab. Confirm when prompted, and your PC will restart.
Step 5: Verify the changes actually took effect
Once back in Windows, open the Run dialog (Windows key + R), type “tpm.msc,” and press Enter. This opens the TPM Management console directly, which will confirm whether TPM is now active and show its version. For Secure Boot, open the Run dialog again, type “msinfo32,” and check the “Secure Boot State” line in System Information, it should now read “On.”
Alternatively, just re-run Microsoft’s PC Health Check app and confirm both requirements now show as passing.
What if the options simply aren’t in your BIOS at all?
This is the scenario that genuinely does indicate a hardware limitation rather than a configuration issue. If you’ve thoroughly checked every relevant tab (Security, Advanced, Boot, Trusted Computing) and there’s no TPM, PTT, fTPM, or Secure Boot option anywhere, your specific motherboard doesn’t support these features, and no amount of settings adjustment will change that.
In this case, your realistic options are staying on Windows 10 with Extended Security Updates while you plan a hardware upgrade, which now runs through October 2027 following Microsoft’s recent extension, or replacing the device with newer hardware that supports these requirements natively. We cover this decision in more depth in Windows 12 vs Windows 10: Should You Upgrade Now or Wait?.
A note on outdated firmware
Occasionally, a PC that should support these features doesn’t show the options because its BIOS/UEFI firmware itself is out of date. Manufacturers periodically release firmware updates that add or properly expose TPM and Secure Boot settings that weren’t available in earlier firmware versions. Check your PC manufacturer’s support site for a BIOS/UEFI update specific to your exact model before concluding your hardware simply can’t support these features. This step gets skipped constantly and occasionally resolves what looks like a hardware wall.
After enabling both, what’s next
Once TPM 2.0 and Secure Boot are both confirmed enabled, re-run PC Health Check to confirm your PC now passes the full Windows 11 compatibility check. From there, you can proceed directly with upgrading. Our complete walkthrough of the actual upgrade process, whether through Windows Update directly or a manual ISO install, is covered in How to Upgrade from Windows 10 to Windows 11: Step-by-Step, and if you’d rather do a clean install from official media instead of an in-place upgrade, see How to Download the Official Windows 11 ISO from Microsoft.
Is this worth doing if you’re hoping to wait for something newer instead?
If part of your hesitation is holding out for a rumored next-generation Windows release rather than upgrading now, it’s worth knowing plainly there’s no confirmed date for that, and current estimates place it no earlier than 2027 if it happens at all. Enabling TPM and Secure Boot now costs you nothing and positions your PC to run Windows 11 today, while also very likely satisfying whatever baseline security requirements a future release would carry anyway, given Microsoft’s consistent direction toward tighter, not looser, hardware security standards. For the current state of that speculation, see our Windows 12 release date and status tracker.
Quick troubleshooting answers
I enabled TPM but PC Health Check still says it’s not detected. What now? Restart your PC fully rather than just closing and reopening the health check app, since some systems need a full reboot for the change to register properly with Windows.
Will enabling Secure Boot delete my files or affect my existing Windows installation? Simply enabling Secure Boot typically doesn’t affect your files. Switching your boot mode from Legacy to UEFI specifically can, in some cases, affect whether an existing installation boots correctly, so back up first if you need to make that particular change.
My BIOS doesn’t have a Security or Trusted Computing tab at all. Where else should I look? Check under Advanced settings specifically, since some manufacturers bury TPM settings there rather than under a dedicated Security tab. If it’s genuinely nowhere to be found after checking every tab, it likely isn’t supported on your specific board.
Is it safe to enable both of these features? Yes, both are standard security features that Microsoft and virtually all PC manufacturers recommend having enabled regardless of which Windows version you’re running, not just for Windows 11 eligibility specifically.